Tuesday, January 31, 2006

Cool Kitchen Gadgetry: Pizza Stone

I usually don't go to sales parties, but a friend that I don't see that often was having a Pampered Chef party, so I went. I wasn't intending to buy anything, but I walked away with a pizza stone. I felt like I had fallen for the peer pressure and I regreted it immediately since the stone was $25.

...that was until used it. I LOVE THE STONE. Pizza's are always crispy. It is great for baking anything that you want to be crispy: fish sticks, pizza rolls, egg rolls. I even use it for baking bread.

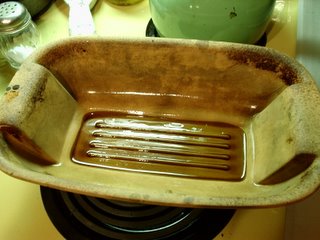
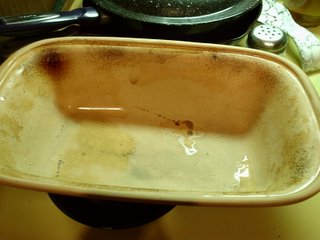
Like the clay pot cooker, it develops a patina that makes it more and more stick free. You can see the patina forming on mine. Unlike the clay pot cooker, however, this stone can be put right in a hot oven.

I just use a plastic scraper or a paper towel to clean it off. Easy.

Sunday, January 22, 2006

Cool Kitchen Gadgetry: French Press

I have been too sick to cook lately, but all this talk about the clay pot cooker got me thinking that I should post about some of the kitchen gadgetry that I just adore.

I won't start with the clay pot cooker, even though I am still pretty excited about it. I'm going to instead start with another gadget that I am pretty excited about: my French press.

I learned about French presses while I was in Scotland. I was getting breakfast one morning at the palace (the Scottish palace that our school leased for having classes overseas) and one of my professors was making his own coffee in a funny little contraption. I asked him about it, because I like really good coffee. He told me that the French press is the only way to go if you like really good coffee.

I was going to buy one while I was over there, but they were glass and I was not bringing any glass back in my bags.

It did not take me long to find one here though. One of my new favorite stores is the World Market from Costco. It ROCKS!! Way better than Pier One. It actually has things that you would use everyday at very good prices. My husband was all for trying anything that would make a really good cup of coffee so he put it in our basket. $25 for this one.

As soon as we got home we started heating some water and grinding some coffee beans.

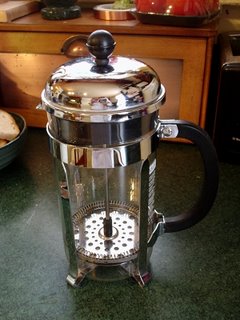
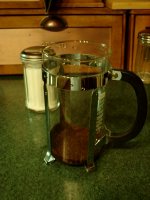
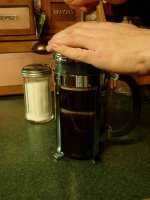
The top is attached to the strainer thing, so that when you pull on the top knob, it pulls the strainer up. You have to pull the whole strainer out and put the ground bean in the bottom.

You want the beans ground coarse so as to not clog up the strainer, but we have used pre-ground coffee with this. When using the pre-ground coffee, you just need to be extra careful when pushing the strainer back down so pressure won't build up and break the glass.

I use about a 1/3 cup of grounds.

Use boiling water. The hotter the water, the better tasting the coffee will be. Also, using good tasting water dramatically affects the taste of the coffee. I use the water from our Britta filter pitcher.

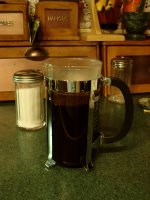
Stir before putting the strainer back in the decanter. Push the strainer down slowly. If it gets hung up, pull up a little, then continue pushing down. The finer the grind, the harder this part can be - but it is easy to get the hang of it.

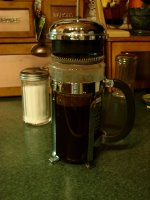
Serve the coffee immediately.

The one that we got only makes about two mugs of coffee at a time, but that is fine, because then each mug is fresh, and we usually only want a cup or two of coffee at a time.

We liked the way that it made coffee so much that we gave away our electric coffee pot. I think this press looks way better sitting on the counter. Don't you?

(BTW: That's SSB's hand modeling this fine kitchen gadget for us)

Sunday, January 15, 2006

Chicken Sum'nSum'n

I was asking my husband what he wanted for dinner. He said that he didn't know. I said that I could make chicken... er, sum'n sum'n. He laughed and said that I should actually come up with a recipe and call it that.

So I did! And now you too can make chicken sum'n sum'n.

Pour 1/2 bottle of a good wine into a large, stain-free bowl. I used a Mirassou pinot noir. I would have drank it, but I had opened it the night before and fell asleep after two glasses and left it out over night. Interestingly enough, it turned from a fruity, woody flavor to one more like green olives. Mmmm... green olives!

Add about a 1/4 cup hoisen sauce. Or more. I really can't remember how much I put in, but it was AT LEAST 1/4 cup! Mix in 3-4 TBS thyme, 1 tsp celery seeds, and a TBS sea salt.

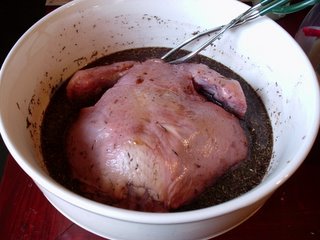
Place a whole chicken into the mix and let marinade for about an hour or so.

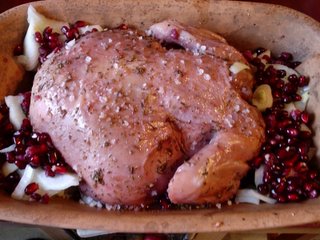
Place the marinaded chicken in a pan for going in the oven. I used the clay pot cooker, but you could use regular pan or a dutch oven. Whatever you got. In a regular pan, I would suggest adding about 1 inch of the marinade to the bottom of the pan to keep the chicken from going dry.

Sprinkle 1 tsp sea salt, 1 tsp ground rosemary over the chicken. Add 4 TBS pomegranate arils and a whole onion cut into 2 inch pieces into the pan around the chicken.

In the clay pot cooker, I cooked it for two hours at 450 degrees. I'm not sure what it would be in a regular pan: 1-2 hours on 350 degrees? I would cover with tin-foil for first hour if in a regular pan, and then crisp the skin for twenty minutes without tin foil.

When cooked in the clay cooker it is so tender that you can use a fork to get meat off the chicken.

I served this chicken with garlic & rosemary mashed potatoes and a salad made with red lettuce, chopped pecans and the rest of the pomegranante arils with a fat free honey dijon dressing. Oh Joy!!

Some were wondering about cleaning the clay pot cooker and I had said that it would build a nice patina that would make it gradually easier and easier to clean. Here you can see it is building a nice one. This is about the fourth time that I have used the cooker and it was easier to clean than even the last time I used it. Took me about 3 minutes with some baking soda, hot water and a scrub brush.
The top isn't getting much of a patina, but then not much food touches it so there's not much to clean.

Saturday, January 14, 2006

Mixed Veggie Pakoras

Mmmm... Indian food! Most Americans have made some Italian food, Mexican dishes, and possibly even tackled a French or Chinese dish or too - even if they were highly Americanized. But I don't know too many people that have tried Indian food, let alone tried to make it themselves.
I tried Indian food for the first time two years ago when I was presenting at a conference in Indianapolis.

Hmmm... Indianapolis? I never made the connection before.

But I actually had it in Bloomington. It does live up to its name. Nearly everyone has a garden and they are all such lovely gardens! I would highly recommend a visit. And the city had some fabulous places to eat, too! I had curry chicken and my husband had tandori chicken. YUMMY!

So when I was in Scotland last year, I was already hip to Indian food. AND, would you believe that Indian food is VERY popular in Scotland? Who knew?

I ate on the run, mostly while I was there. I bought a lot of foods at the grocery deli counters, and they always had a huge assortment of tasty Indian food. Since I could buy by the piece, I took the opportunity to try out some new stuff. One of these was pakora.

ABSOLUTELY DELICIOUS!! I ate them all the time!

So, when I got my new favorite cookbook, probably my favorite recipe book of all-time, I marked the pakoras on my list of recipes to try.

I made them last week, and as usual, I didn't have all the right ingredients, so I improvised. Maybe that is a talent.

Here's the recipe as is in the book:
  • 6 TBS gram(besan) flour
  • 1/2 tsp salt
  • 1 tsp chili powder
  • 1 tsp baking powder
  • 1-1/2 tsp white cumin seeds
  • 1 tsp pomegranate seeds
  • 1-1/4 cups water
  • 1 TBS finely chopped cilantro
  • your choice of vegetables
  • vegetable oil for frying
Well, I thought I had besan (gram flour), which is a flour made from chickpeas/garbanzo beans; but alas, I did not. SO, I took some dried chickpeas and ground them into a powder with my blender. Only realizing afterwards that taking canned chickpeas and grinding them up would have been much easier! Oh well, NEXT TIME!

First you add everything but the cilantro and vegetables. Using a grinding mixer (I used a hand mixer), blend until smooth. Instead of white cumin seeds, I used cheap-brand cumin and PLENTY of it! 1-1/2 tsp my ass! I used cayenne pepper for the chili. You can use any kind of chili pepper you want. Some pepper may be too distinct for this dish, but off hand none come to mind - so just use what you want. I also threw in extra gram and some regular flour because the batter was so soupy. I figured that the batter should have the consistency of onion ring batter.

I also threw in extra pomegranate seeds. This is my first run in with a pomegranate. Interesting fruit. I will have to find more uses for it. But it is SO expensive! I figured since I had gone through so much trouble getting the sucker open and really didn't know what else I would use it for, I should throw extra seeds into this recipe. I think I used about 3-4 TBS.

Once the batter is the way that you would like it, mix in the chopped cilantro. Once again, I threw in extra because I LOVE cilantro!!
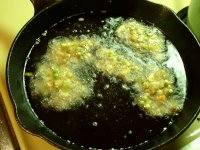
Start heating a few inches of oil in a heavy pan. The pakoras should be able to float. Or if you have a deep fryer you can use that too. I used peanut oil.

Once the oil is hot enough to fry, mix the vegetables of your choice into the batter. I would suggest using fresh vegetables. I used frozen mixed veggies with the beans, peas, corn, lima beans, and carrots - but we all agreed that even though the pakoras were very good, they would have been great if I had used fresh veggies.

Cauliflower is a good one to use for this. I also chopped up potatoes and added this to the frozen mix veggies. That was really good. Just use what you like. I do have to say that this batter makes lima beans delicious (well, probably as delicious as lima beans can get anyway).

Using a slotted spoon, spoon the veggies out of the batter and into the hot oil. Becareful the oil isn't too hot or the batter will burn and the veggies won't cook. Turn the pakoras once they appear to have browned nicely on the underside. Fry the other side until it is also deep brown.

Using another slotted spoon, take the pakoras out of the oil and place onto a plate lined with a paper towel to drain the excess oils.

The finished pakora pictures didn't turn out that great, but the pakoras sure were tasty!

Serve these hot on their own or you could make a yogurt sauce for them. They are also very good reheated later.

Thursday, January 12, 2006

Sesame Hot Bastard Noodles

Ah! Making these noodles was a test in patience. Not because they are so hard to make, they are actually quite easy. It was due to a series of unfortunate events. First, I spilled hot oil all over the stove and floor. It took nearly an hour to get it all cleaned up. Then I realized that I didn't have enough sesame seeds. Then, while I was toasting what little seeds I could find, I had to help my son chop the cilantro and I ended up almost burning the seeds. Then, when I put the peanut butter in the pan, it nearly burned too, even though I had the heat turned down to "warm". All while I was making the noodles I kept yelling "bastard" so my husband SSB suggested that would be a good name for them. I wasn't sure how they would turn out considering all the problems, but they were NUMMY!!

Obviously you need to make noodles. I used spaghetti. They are a good all-around noodle.

Toast three tablespoons sesame seeds (I only had about teaspoon, so I made up the difference with cashews). Turn down heat. Add a tablespoon of sesame oil (or just use what you have). Throw in three cloves minced garlic. When the garlic has turned translucent, add a heaping tablespoon of peanut butter - smooth or crunchy. Sprinkle in a little cayenne pepper and add a couple tablespoons of chopped chives the recipe called for green chilies, which I also did not have so I improvised with a few dashes of cayenne pepper). Also stir in a few tablespoons light soy sauce (I didn't have this either so I used regular LaChoy) and a tablespoon of lime juice.

When everything is mixed into a nice sauce, remove from heat and add four tablespoons of chopped cilantro. Add the cooked, drained noodles and stir to coat them all with the sauce. Salt and pepper the whole thing. If, like me, you didn't have enough sesame seeds, you can top everything with a couple handfuls of cashew pieces and serve.

Sunday, January 08, 2006

Shrimp Scampi Pasta

I love seafood, especially shellfish, and one of my favorite bug-o-the-sea is shrimp. My favorite preparation of shrimp is garlic and butter which in most of the U.S. is known as "scampi". To some in other countries "scampi" is actually the shrimp itself or a particular kind of shrimp - usually with claws like a mini lobster. (see difference below: top picture is shrimp, bottom picture is scampi)

I got a great deal on shrimp a few weeks back with the plan of just eating them with a shrimp sauce...until I saw a Red Lobster commercial with Shrimp Scampi in it. YUMMMY!! So I set out to learn how to make the stuff myself.

Shrimp is sold in number per pound. The less shrimp you get per pound the more expensive the shrimp. Some argue that the smaller the shrimp (the more shrimp per pound) the more flavorful the shrimp is. My shrimp was 80/100, which is small, but was perfect for pasta.

Shrimp Scampi is just garlic, butter, a little olive oil if you like, salt and parsley. Very simple recipe. If you want to eat it just on its own, you will want to clarify the butter. I haven't figured out how to do that yet, hence the pasta.

I can't remember how much butter or garlic I used. I think it might have been a whole stick of butter and almost a whole bulb (not clove, the whole BULB!) of garlic. I LOVE garlic and butter!! You can use as much or as little of either that you prefer. You can chop up the butter to make it melt faster and the garlic needs to be chopped finely before adding. The parsley isn't important to measure either. I used about a handful of it. Yeah, I'm lazy. I don't like to dig out and dirty measuring utensils so I use my hands to measure most of the time.

Make sure that the temp isn't too high. You want the temp high enough to melt the butter but not so high that it burns the butter. I think I used medium heat.

Throw the butter and garlic in a pan. You can also throw in the salt at this point. I use sea salt because I like the flavor of it. It is far less harsh and much more layered than regular table salt.

While you are melting the butter, start a pot of water for the pasta. I just used spaghetti, because that is what I had. You could use what ever you have. You'll want to put a little olive oil and salt in the water. The salt brings out the flavor in the pasta and the oil keeps the pasta from sticking.

Only put the pasta in once the water is boiling and keep the water boiling until the pasta is done. A huge mistake that people make when making pasta (besides picking yucky brands: I prefer Barilla brand pasta. It cooks up perfectly and has a great, fresh flavor) is that the water isn't hot enough. That, and they over cook the pasta. Pasta should be cooked until it's almost done. It will continue to cook after you take it off the heat. When the pasta is getting near done, you should periodically pull a piece out and bite into it to see where it's at. You want to take it off the heat and drain it when there is just a tiny bit of bite left in the pasta, especially for this recipe since you will be adding the pasta to the shrimp pan for the last minute or so of cooking time.

Once the butter is melted, then throw in the shrimp. Mine was frozen, and maybe I should have thawed it first, but did I mention that I am lazy? Well, more like efficient. I like to get rid of unnecessary steps.

A huge mistake that people make when cooking seafood is over-cooking it. When the seafood is raw, it is translucent. You want to cook it until it has just turned opaque. Over-cooking seafood makes it tough and rubbery. Perfectly cooked seafood should be tender and flaky (except cephalopods - I think they will pretty much always be at least a little rubbery).

Once the shrimp has just turned opaque, throw in the parsley and drained pasta (assuming that the pasta is finished cooking by now - you might want to cook your pasta ahead of time to be sure that it is ready by this point in the cooking). Mix everything well and cook for another minute or so to mix the flavors.

Serve immediately, which shouldn't be a problem because you are probably starving by now!! And believe me, this tastes even better than it looks! ::drool::

The shrimp image was borrowed from www.scampirestaurant.com
The scampi image was borrowed from www.chartingnature.com

Sunday, January 01, 2006

I Love Snow!!

A few weeks back I promised pictures of my garden in its snowy state. We just got another few inches of snow and it was beautiful! I also remembered to get the camera and take a few pictures this time, so here they are...

Doesn't my little garden shed look adorable tucked away in the snow? I am so glad we got the roof fixed or all that snow would be IN the shed right now!

I took this same picture of the cone flowers during the growing season. Now they are "snow" flowers! I'm so glad that I leave most of my flowers up for the winter. They are just so beautiful cover in fluffy snow.

This is one of the rivers that flows through our town. I love it when the snow clings to the braches of the trees. It looks like a fairy tale.

Ah! I love snow!!